

Book a demo
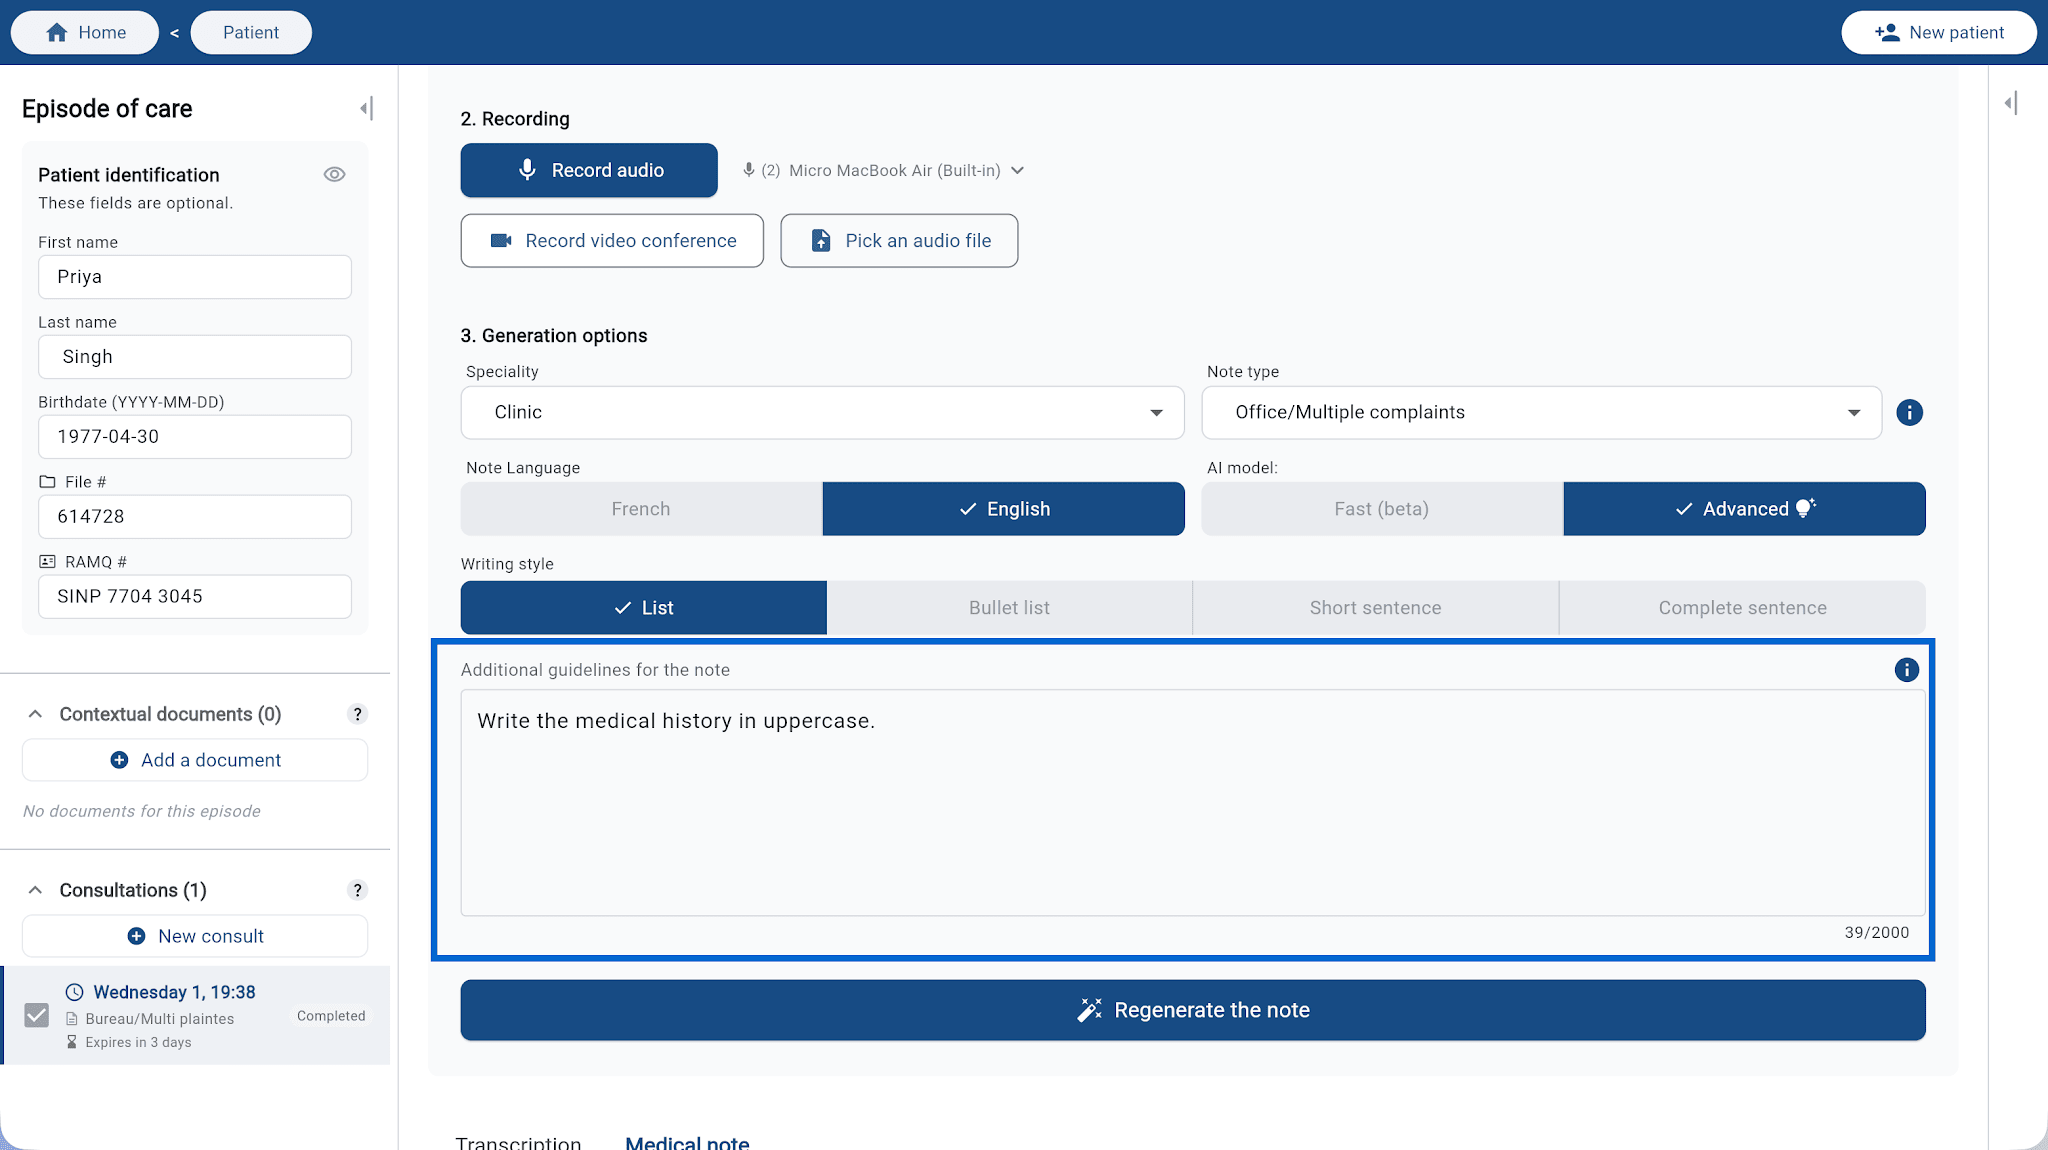
The Additional directives field lets you give the AI clear instructions so your notes match how you write: content, layout, sections, tone. You can be as specific as you like.
“Write past medical history in all caps.”
“At the end of the clinical note, add a Patient appreciation section.”
“Add a 2–3 line summary at the end of the note for the family physician.”
Not happy with the result? Adjust your directive and regenerate again, as many times as you need.
If you reuse the same directives, save them as reusable templates in settings. You can then insert them in one click from the directives field.
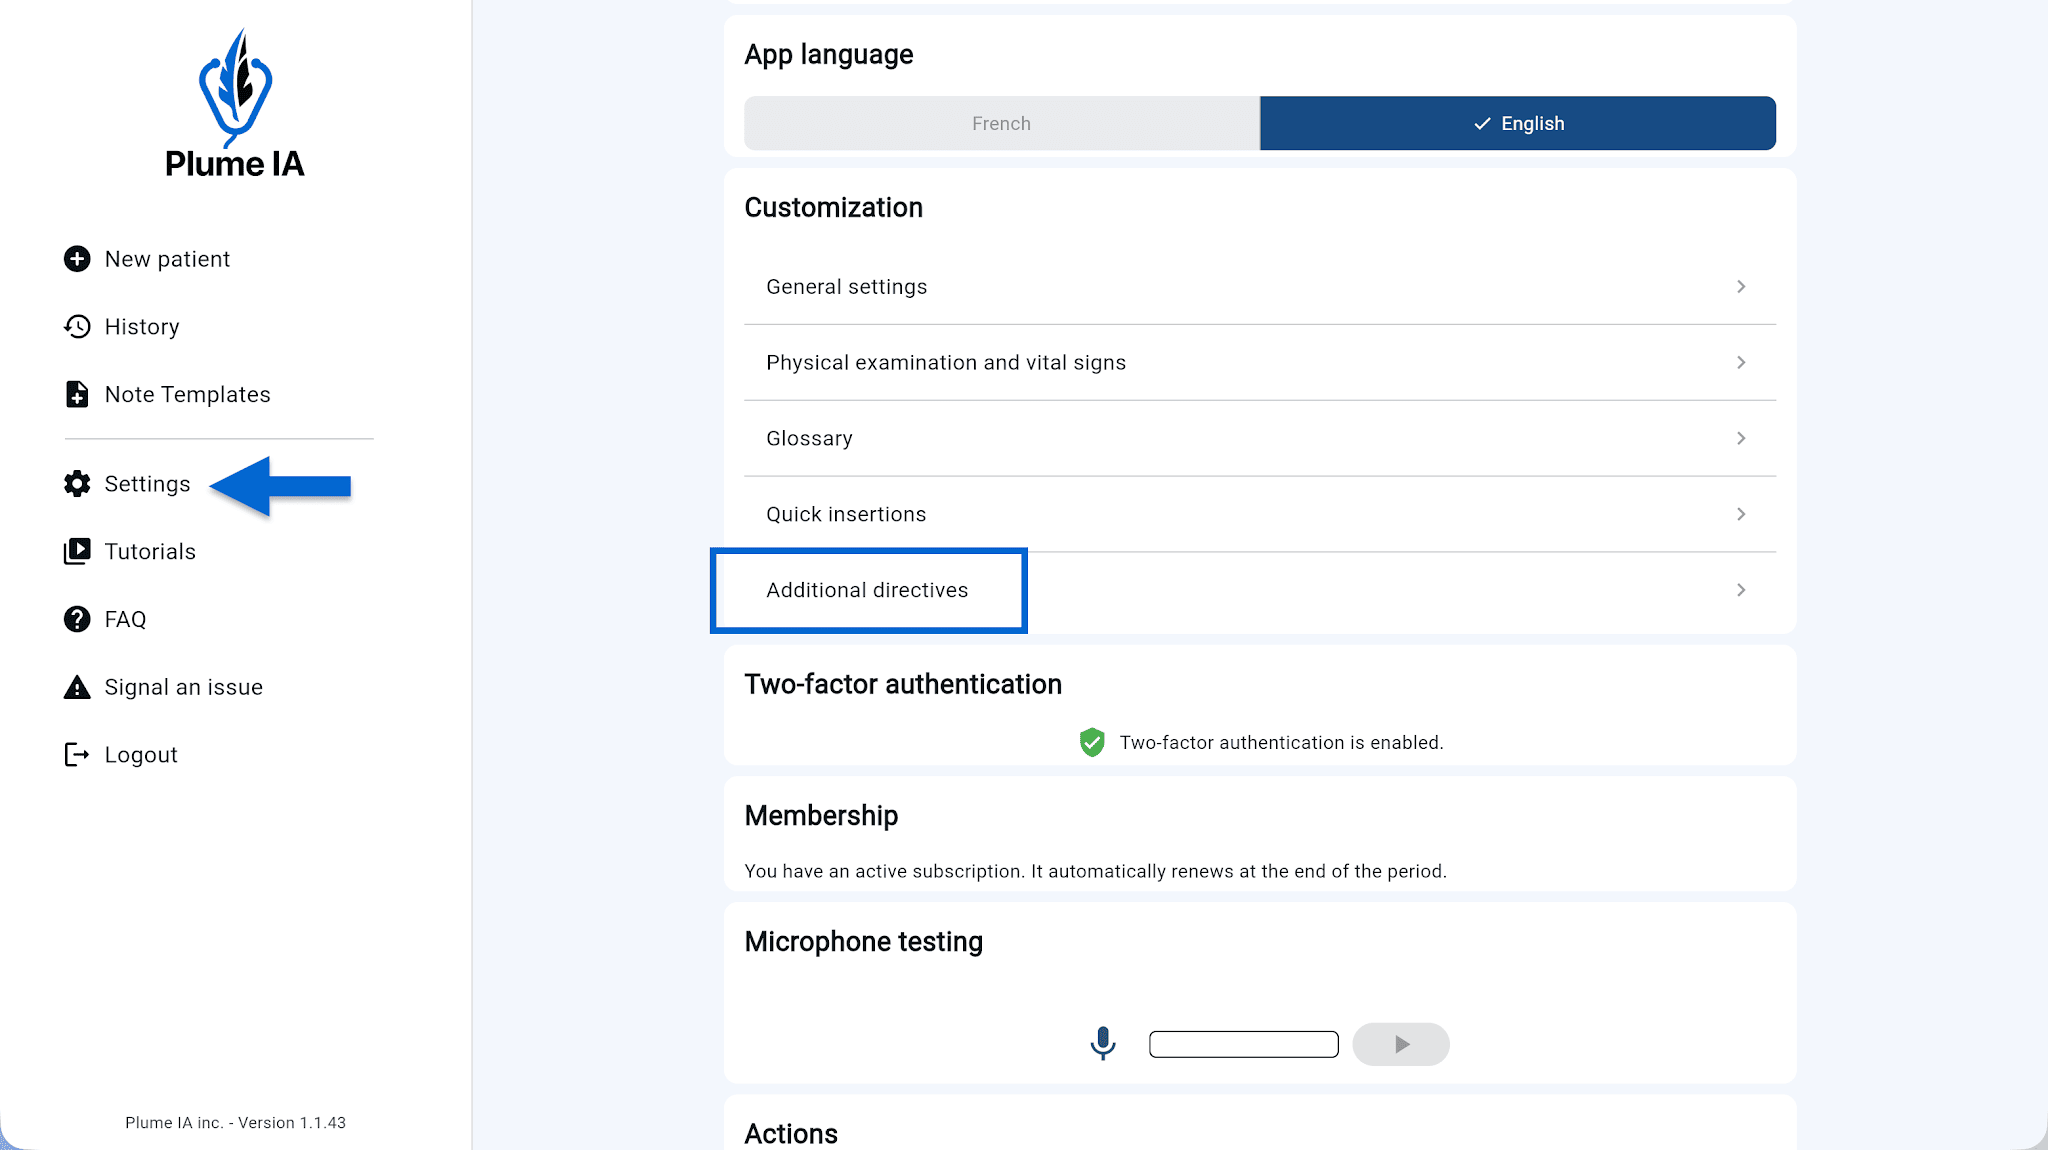
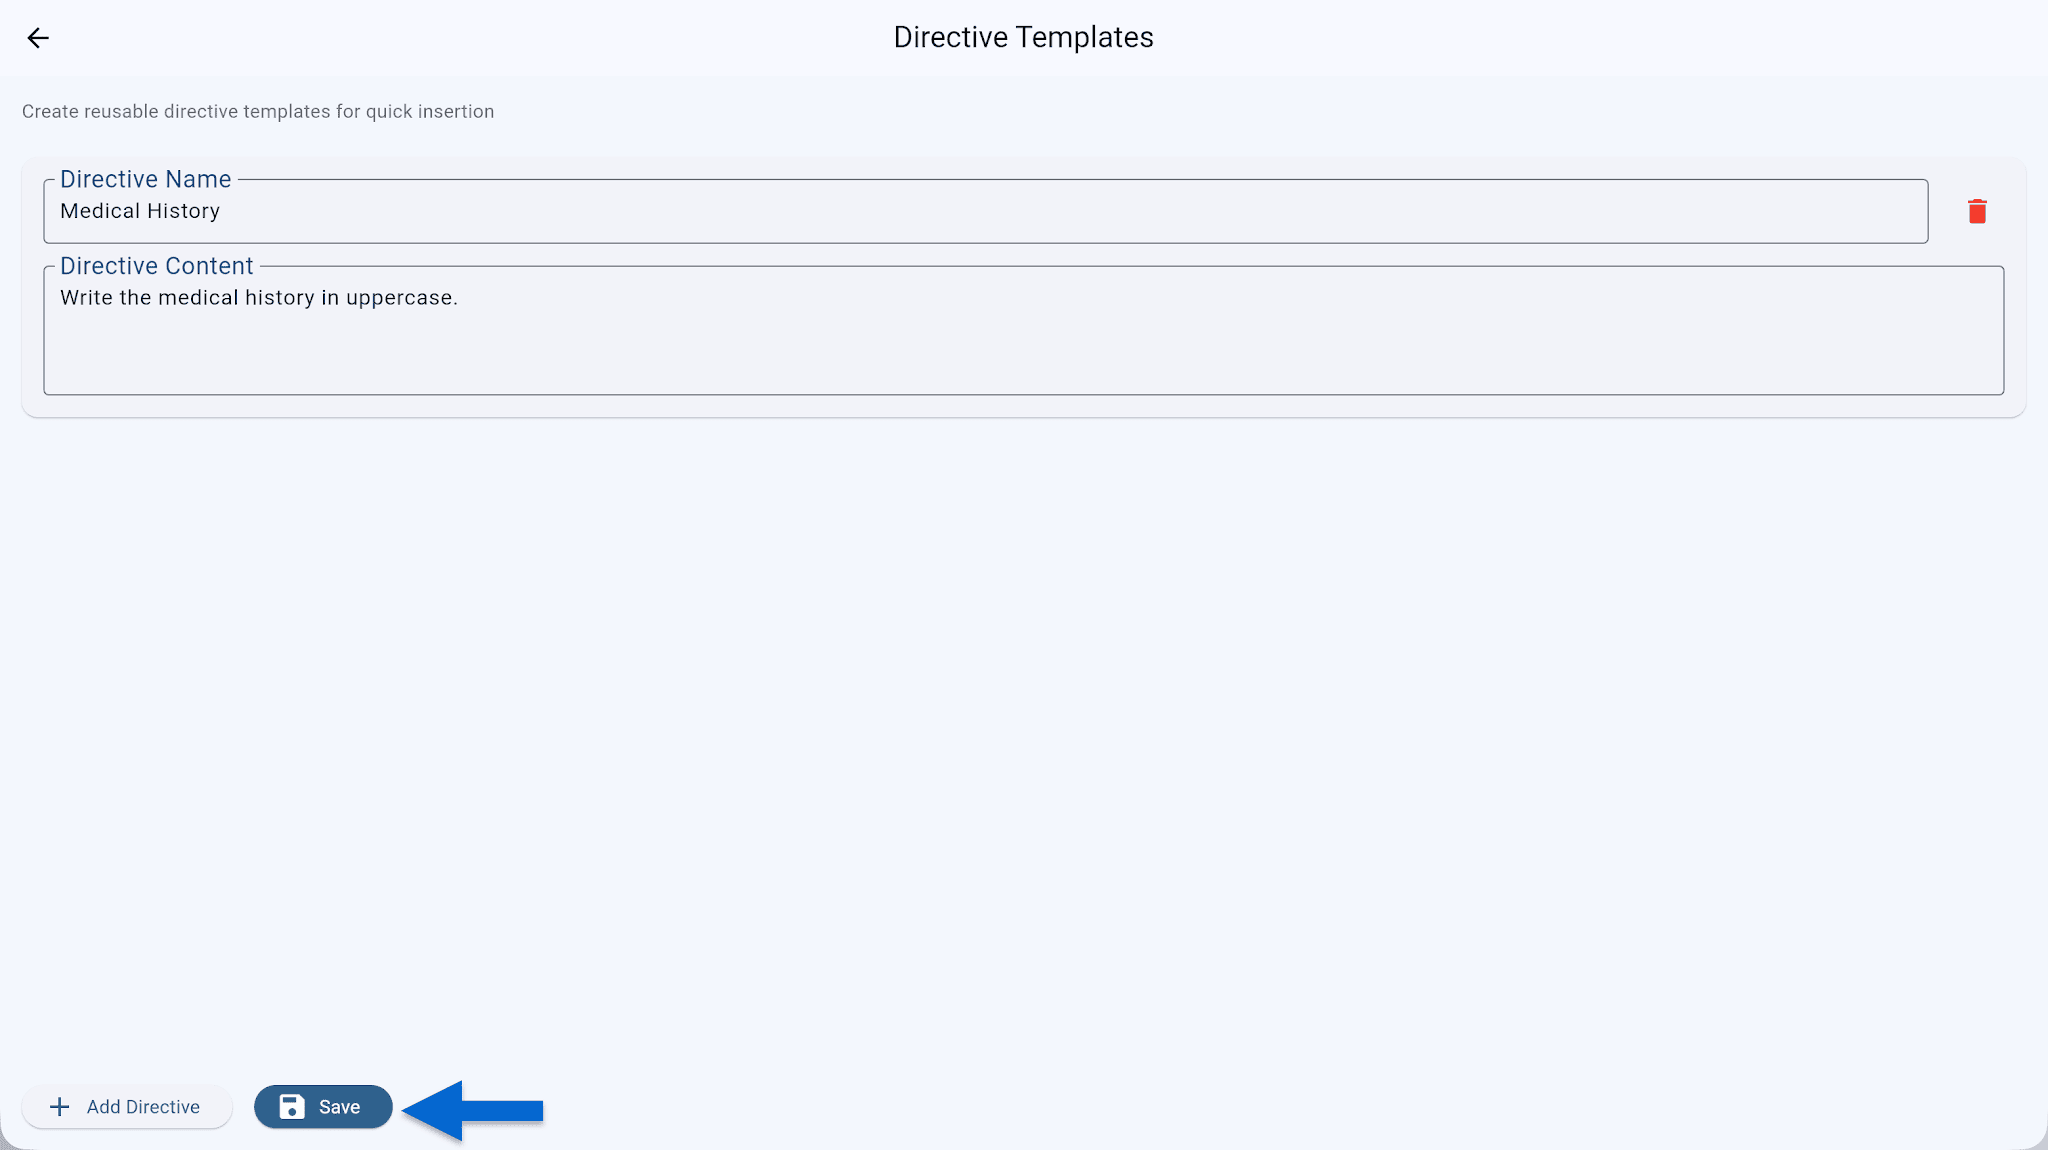
You can also create a new directive from this menu by clicking Create new directive.
💡 Tip: The clearer and more detailed your instructions, the better the outcome. A good approach: start broad and see if you like the result, then refine if needed. Describe actions step by step—instead of “improve the note,” prefer “add a Treatment plan section after clinical impressions, as bullet points, including treatment frequencies.”